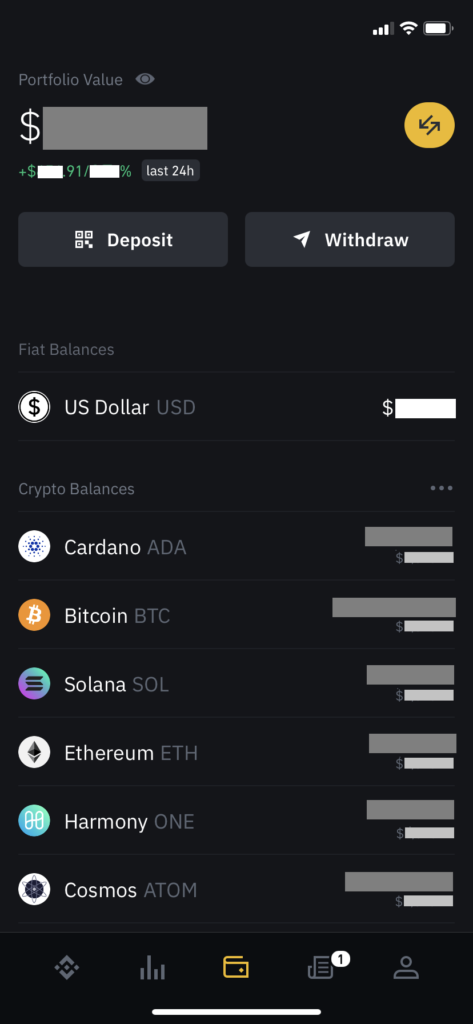
Binance users are familiar with this Portfolio screen on their phones. If you have bought or earned some crypto assets and are planning to sell them, you would want to see how much money have you made or lost so far. But the Binance mobile app makes it difficult for you to compute this on-the-fly. It only shows the number of units and total dollar value you have.

This tutorial intends to improve that previous post How to Write a Program to display Binance Portfolio View Using Java + Spring Boot, where at the end of my post I suggested to Call Binance API for a real-time Order History instead of downloading the transaction history into a CSV file.
I started investigating on the solution using Java. But it was frustrating to call the API directly. Adding the X-MBX-APIKEY in the header or the URL was not giving me successful response. I used Postman REST client and I also wrote programs to call Java third-party libraries. I was always getting APIError(code=-2015): Invalid API-key, IP, or permissions for action.
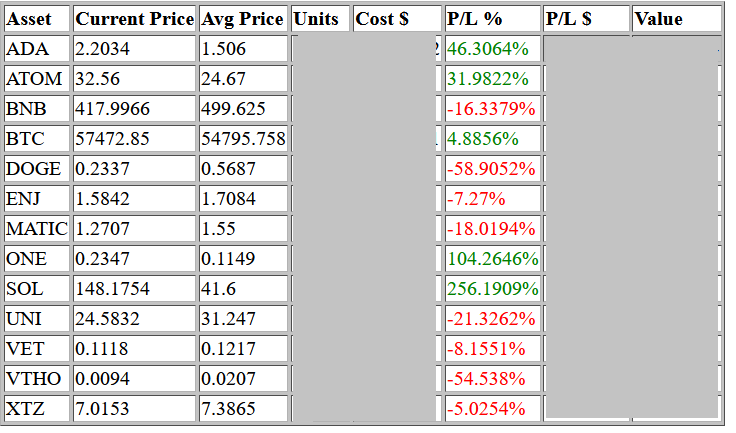
Then I checked if it is possible to call the API via Python, since I created a trading bot using Python before. Tutorial is here How to Build a Trading Bot Framework (TradingView + Python + Heroku) It was easier. So I decided to convert my Java program into Python.
Known Issues:
- The logic for computing of P/L only works if you traded using USD
- This does not include crypto which were deposited
- Any distributions earned (e.g. ATOM, VTHO) will not be added in the portfolio
- Fees are also not deducted from each transaction
Tutorial
- Part 1 Setup Binance API Key
- Part 2 Setup Environment Variables
- Part 3 Setup Python project workspace
- Part 4 Setup Git
- Part 5 Deploy in Heroku
PART 1 SETUP BINANCE API KEY
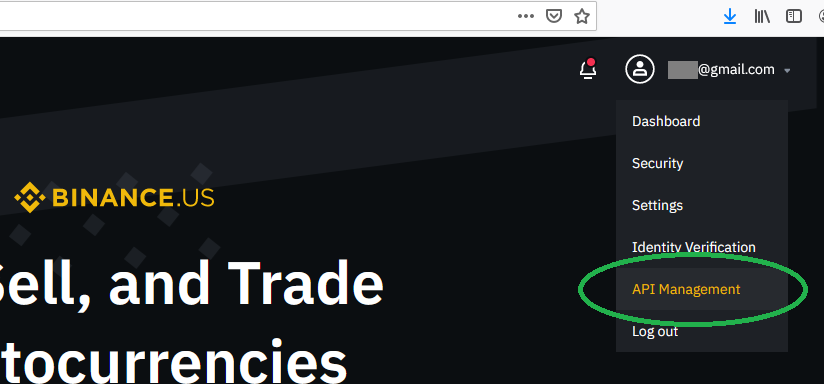
Step 1. Login to your Binance US account.
Step 2. Click “API Management” under the email address drop-down.
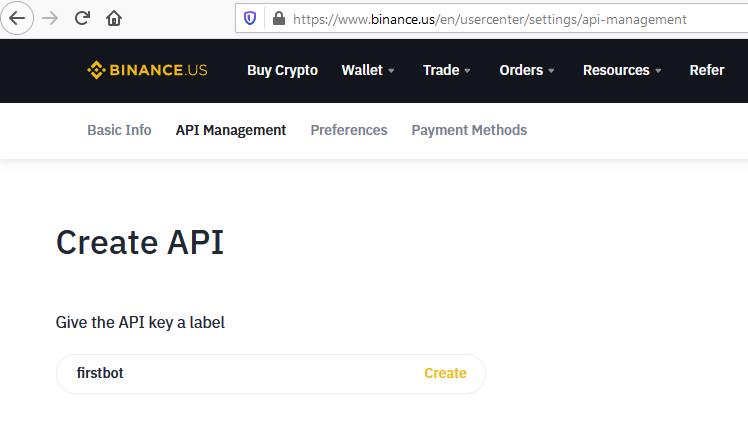
Step 4. An email is sent to confirm that you created the API key.
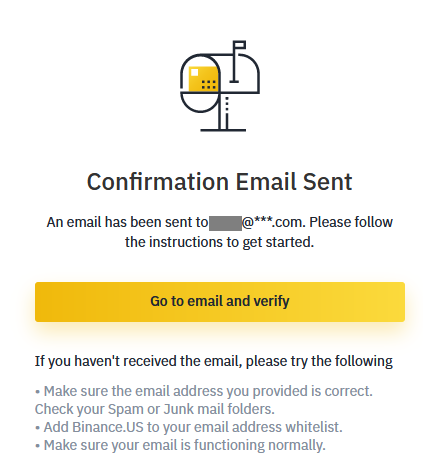
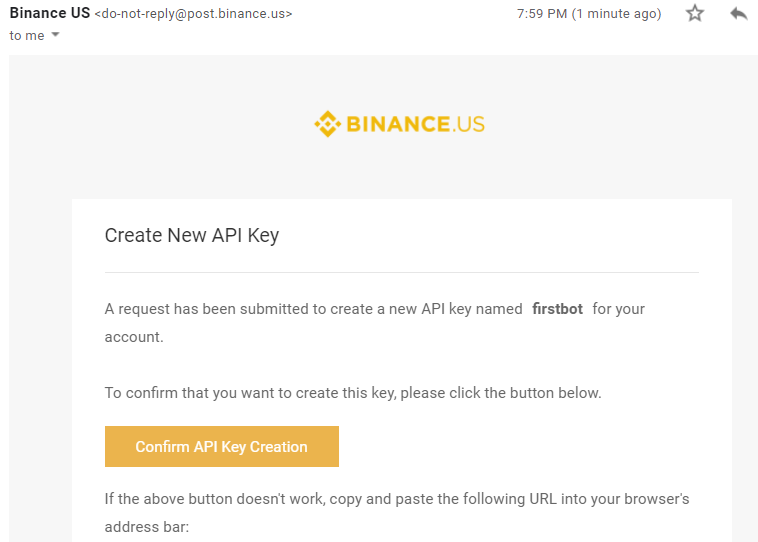
Step 5. Open your email. Click “Confirm API Key Creation” button.
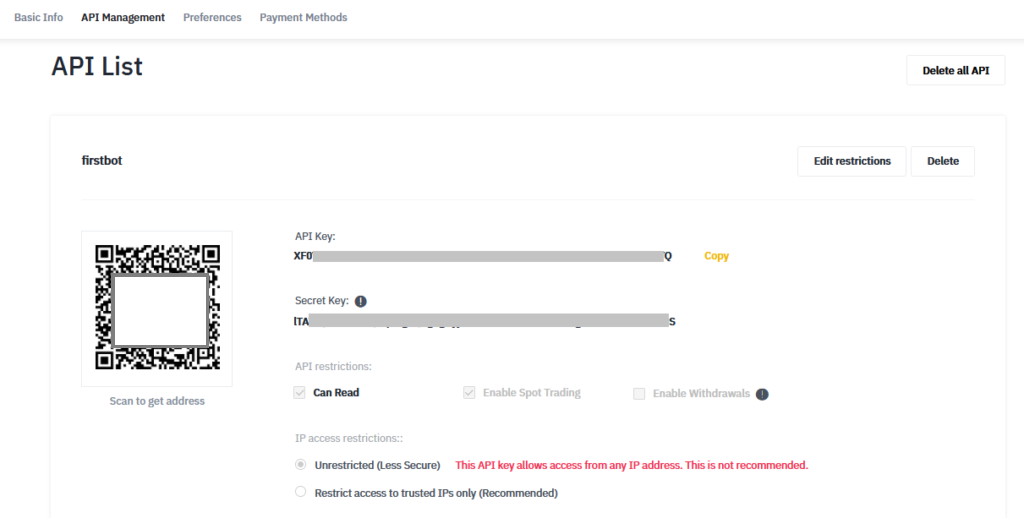
Step 6. The newly-created API key will be displayed. The API Key and Secret Key will later be used in PART 2 Step 3. Make sure to copy the Secret Key somewhere, you will not be able to get this from Binance in the future.
PART 2. SETUP ENVIRONMENT VARIABLES
Step 1. Type “Environment variables” in the Windows search bar. Choose the Best match.
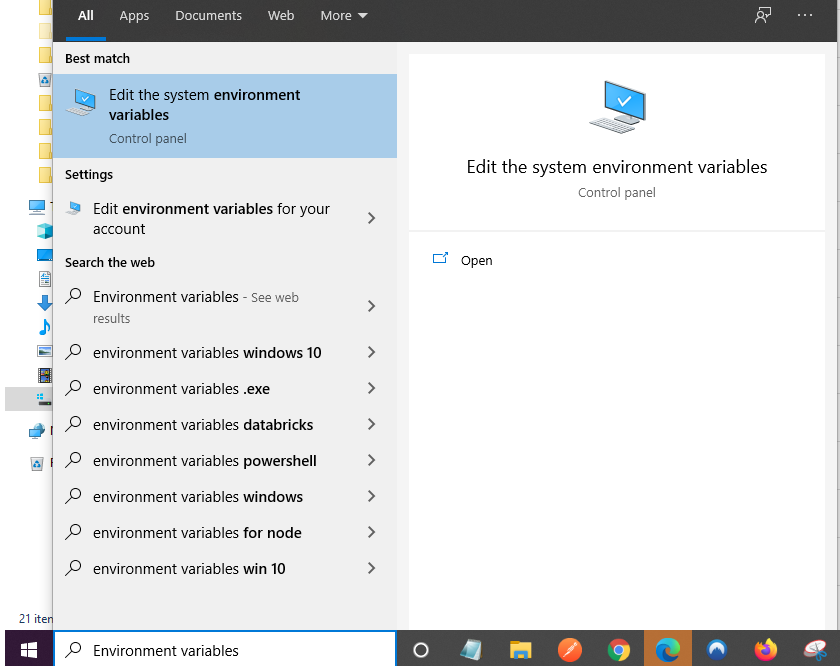
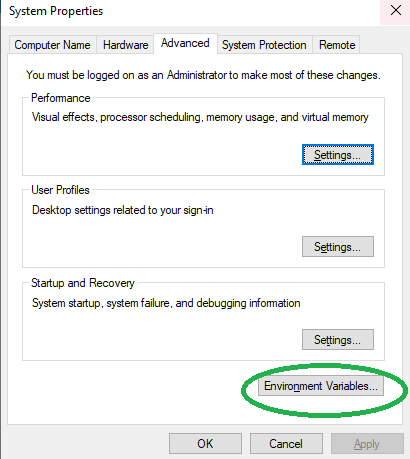
Step 2. Click “Environment Variables…” button
“Environment Variables…” button
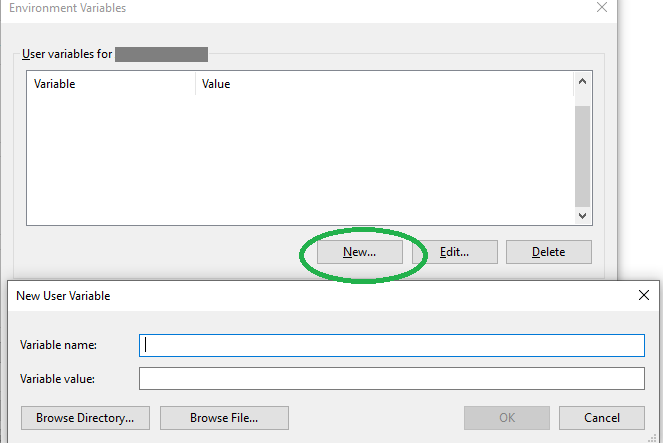
Step 3. Click “New…” In the Variable Name and Variable Value fields, enter these combinations
| Variable name | Variable value | Notes |
| API_KEY | Copy the API Key from Part 1 Step 6 | |
| API_SECRET | Copy the Secret Key from Part 1 Step 6 |
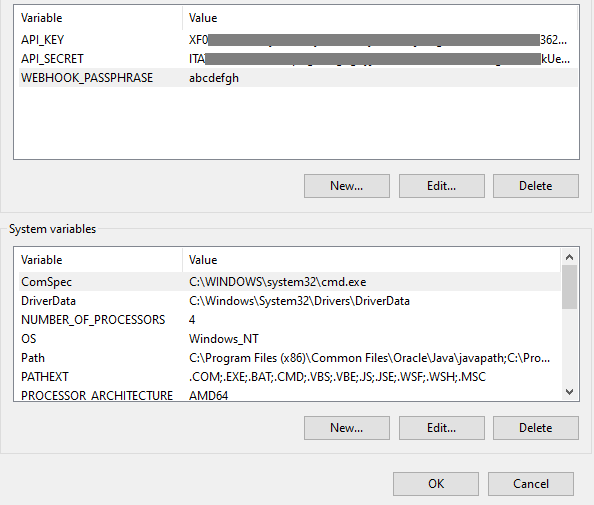
Step 5. The list of environment variables for the current user should look like this. Click the OK button to save.
PART 3 SETUP PYTHON PROJECT WORKSPACE
Step 1. Install Pycharm Community Edition in https://www.jetbrains.com/pycharm/download/
This tutorial uses the latest stable release pycharm-community-2021.1.2.exe
Step 2. Open Pycharm. Create New Project with a Virtual environment. The latest Pycharm installer will always have new virtual environment installed.
Step 3. Create new file with filename requirements.txt. It is important to have this file. When deploying, Heroku automatically identifies your app as a Python app if requirements.txt present in its root directory.
flask
gunicorn
python-binance
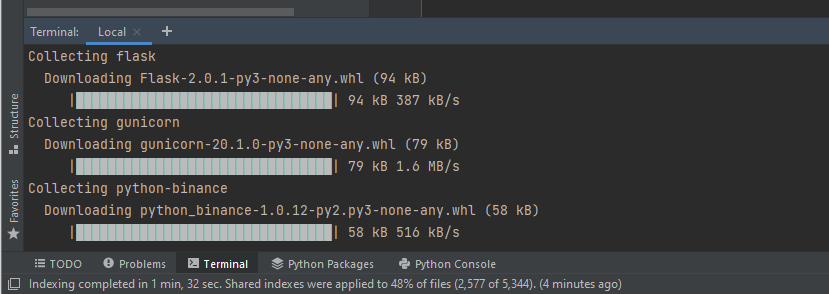
Step 4. Select “Terminal” on the bottom panel. This will launch a command line. Execute the command
pip3 install -r requirements.txt
Step 5. Create new file with filename app.py
Go to https://flask.palletsprojects.com/en/1.1.x/quickstart/
Copy the contents of Minimal Application
from flask import Flask
app = Flask(__name__)

@app.route('/')
def hello_world():
    return 'Hello, World!'
Step 6. Create a file with filename Procfile. Associate it to a text file. Copy the below contents
web:gunicorn app:app
Step 7. In the Terminal window, execute
flask run

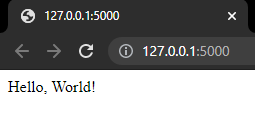
Step 8. Open http://127.0.0.1:5000/ in a web browser. This will confirm that the local flask application is up.
Step 9. Create a new file named app.py and copy the below code.
import os
from binance.client import Client
from binance.enums import *
from flask import Flask, request

app = Flask(__name__)
client = Client(os.environ.get('API_KEY'), os.environ.get('API_SECRET'), tld='us')


@app.route('/')
def welcome():

    html = "<table border=1><tr><td><b>Asset</b></td>" \
           "<td><b>Current Price</b></td>" \
           "<td><b>Avg Price</b></td>" \
           "<td><b>Units</b></td>" \
           "<td><b>Cost $</b></td>" \
           "<td><b>P/L %</b></td>" \
           "<td><b>P/L $</b></td>" \
           "<td><b>Value</b></td>" \
           "</tr>"
    account = client.get_account()
    myassets = []
    # Get all assets under client.get_account()
    account['balances'].sort(key=lambda x: x["asset"])
    for x in account['balances']:
        if x['asset'] != 'USD' and (float(x['free']) > 0 or float(x['locked']) > 0):
            myassets.append(x['asset'])

    tickers = client.get_all_tickers()
    transactions = []
    transaction = {}
    totalTransPrice = 0.0
    balanceUnits = 0.0
    summaryTotal = 0.0
    oldsummaryTotal = 0.0
    totalSoldUnits = 0.0
    qty = 0.0
    currentPrice = 0
    reset = False

    for myasset in myassets:
        myasset = myasset + 'USD'
        try:
            # Get all account orders; active, canceled, or filled.
            orders = client.get_all_orders(symbol=myasset, limit=100)
            totalTransPrice = 0.0
            balanceUnits = 0.0
            summaryTotal = 0.0
            totalSoldUnits = 0.0
            price = 0.0
            lastKnownPrice = 0.0 #sometimes API returns price=0.0. As a hack, use the last known price for the asset

            transaction = {}
            for x in orders:
                if x['status'] == 'FILLED': #Filter only orders which were executed
                    qty = float(x['executedQty'])
                    price = float(x['price'])
                    if lastKnownPrice == 0.0 or price != 0:
                        lastKnownPrice = price
                    if price == 0.0:
                        price = lastKnownPrice
                    totalTransPrice = qty * price
                    reset = False
                    if x['side'] == 'BUY':
                        balanceUnits += qty
                        summaryTotal += totalTransPrice
                    elif x['side'] == 'SELL':
                        balanceUnits -= qty
                        totalSoldUnits += qty
                        oldSummaryTotal = summaryTotal
                        summaryTotal -= totalTransPrice

                        if oldSummaryTotal > 0:
                            reset = round(totalTransPrice / oldSummaryTotal, 4) < 1
                        if summaryTotal < 0 or reset:
                            totalTransPrice = 0.0
                            balanceUnits = 0.0
                            summaryTotal = 0.0
                            totalSoldUnits = 0.0
                            price = 0.0
                            reset = True
                            transaction = {}
                    if reset == False:
                        transaction['symbol'] = x['symbol']
                        currentPrice = get_current_price(tickers, x['symbol'])

                        transaction['currentPrice'] = currentPrice
                        transaction['avgPrice'] = summaryTotal / balanceUnits
                        transaction['balanceUnits'] = balanceUnits
                        transaction['totalSoldUnits'] = totalSoldUnits
                        transaction['costUSD'] = summaryTotal
                        transaction['valueUSD'] = float(currentPrice) * balanceUnits
                        transaction['pnl'] = (float(currentPrice) * balanceUnits) - summaryTotal
                        transaction['pnlPercent'] = -(1 - ((float(currentPrice) * balanceUnits) / summaryTotal)) * 100

        except Exception as e:
            print("An exception occurred - {}".format(e))
        if transaction != {}:
            transactions.append(transaction)
    transactions.sort(key=lambda x: x["symbol"])
    for trans in transactions:
        strCurrentPrice = str(round(float(trans['currentPrice']), 4))
        if trans['pnl'] >= 0:
            strPnl = f"<font color=green>{str(round(trans['pnl'], 4))}</font>"
        else:
            strPnl = f"<font color=red>{str(round(trans['pnl'], 4))}</font>"
        if trans['pnlPercent'] >= 0:
            strPnlPercent = f"<font color=green>{str(round(trans['pnlPercent'], 4))}%</font>"
        else:
            strPnlPercent = f"<font color=red>{str(round(trans['pnlPercent'], 4))}%</font>"
        html += "<td>" + str(trans['symbol']).replace('USD', "") + "</td>"
        html += "<td>" + strCurrentPrice + "</td>"
        html += "<td>" + str(round(trans['avgPrice'], 4)) + "</td>"
        html += "<td>" + str(round(trans['balanceUnits'], 4)) + "</td>"
        html += "<td>" + str(round(trans['costUSD'], 4)) + "</td>"
        html += "<td>" + strPnlPercent + "</td>"
        html += "<td>" + strPnl + "</td>"
        html += "<td>" + str(round(trans['valueUSD'], 4)) + "</td>"
        html += "</tr>"
    html += "</table>"
    return html


def get_current_price(tickers, assetPair):
    price = 0
    strAsset = ""
    for ticker in tickers:
        strAsset = ticker['symbol']
        if assetPair == strAsset:
            price = ticker['price']
    return price
PART 4 SETUP GIT
Step 1. Install Git from https://git-scm.com/downloads
Step 2. Open Git CMD and run this in the command line.
git config --global user.email "hello@example.com"
PART 5 DEPLOY IN HEROKU
Step 1. Sign up for a Heroku account in https://signup.heroku.com/account if you do not have an account yet.
Step 2. From the Dashboard, https://dashboard.heroku.com create new Heroku application
Step 3. Enter the application name, e.g. binance-portfolio-viewer
Step 4. Setup the environment variables. In Heroku, this can be found in the application’s Dashboard –> Settings tab. Scroll to Config Vars.
| Variable name | Variable value | Notes |
| API_KEY | Copy the API Key from PART 1 Step 6 | |
| API_SECRET | Copy the Secret Key from PART 1 Step 6 |
Step 5. Once the application is successfully created, go to the application’s Dashboard –> Deploy tab. Refer to Deploy using Heroku Git.
Step 5a. Download and install Heroku installer that can be found in https://devcenter.heroku.com/articles/heroku-cli
Step 5b. Run this command in command prompt:
heroku login
It will ask you to press any key to open a browser. Login using the email address of your Heroku account.

Step 5c. To setup SSH key, run in the command prompt:
heroku keys:add

Step 5d. Run in the command prompt:
ssh -v git@heroku.com
To verify the key has been added, open https://dashboard.heroku.com/account and scroll to the SSH Keys section.
Step 5e. In the Pycharm project Terminal, issue these commands:git init
heroku git:remote -a binance-portfolio-viewer
If the commands do not work, double-check the PATH to include C:\Program Files\heroku\bin and C:\Program Files\Git\cmd
Step 5f. When there are changes in local codes that need to be committed to the Heroku Git server, execute these commands:
git add .
git commit -am "initial commit"
git push heroku master
Step 5g. To verify that the Heroku web application is live, open in a web browser https://{app-name}.herokuapp.com . For example, https:// binance-portfolio-viewer .herokuapp.com
The source codes for this project can be downloaded here.
References
* Python-Binance on Github* Unofficial Python wrapper for the Binance API

