This tutorial was a result of Part Time Larry’s video TradingView Strategy Alert Webhooks with Binance API, Heroku, Python, and Flask. Below are the sections of this tutorial:
- Part 1 Setup TradingView Alert Webhook
- Part 2 Setup Binance API Key
- Part 3 Setup Environment Variables
- Part 4 Setup Python project workspace
- Part 5 Test using REST Client
- Part 6 Setup Git
- Part 7 Deploy in Heroku
- Part 8 Go Live
PART 1 : SETUP TRADINGVIEW WEBHOOK
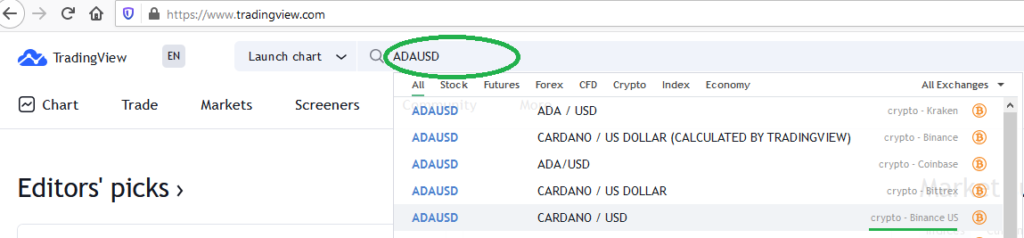
Step 1. Login in to www.tradingview.com . Make sure your subscription is at least Pro. You may sign up for a 30-day trial account. https://www.tradingview.com/gopro/
Step 2. Select the pair you want to trade. In his example, it is ADAUSD from Binance US.
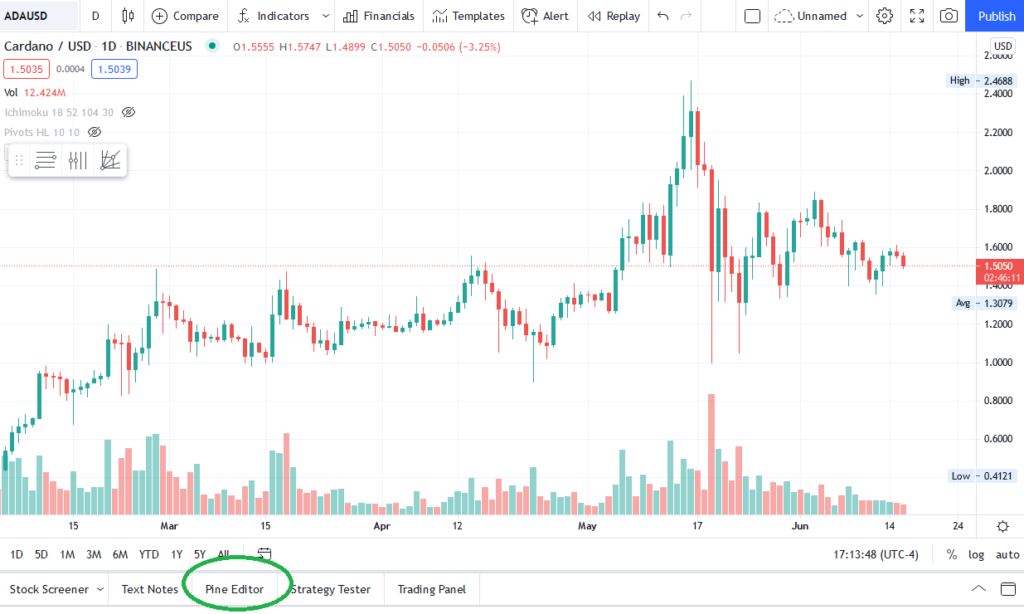
Step 3. On the bottom panel, select “Pine Editor“.
Step 4. Copy the sample-cardano-sma.pinescript below. Paste it in the “Pine Editor“. NOTE that this is NOT a profitable strategy. Please do your own research on a profitable trading strategy.
//@version=4
strategy("ADA SMA", overlay=true, initial_capital=25, default_qty_type=strategy.percent_of_equity, default_qty_value=100)

start_date = input(title="Start Date", type=input.integer, defval=1, minval=1, maxval=31)
start_month = input(title="Start Month", type=input.integer, defval=5, minval=1, maxval=12)
start_year = input(title="Start Year", type=input.integer, defval=2021)
end_date = input(title="End Date", type=input.integer, defval=6, minval=1, maxval=31)
end_month = input(title="End Month", type=input.integer, defval=9, minval=1, maxval=12)
end_year = input(title="End Year", type=input.integer, defval=2021)

between_dates = (time >= timestamp(start_year, start_month, start_date, 7, 0)) and (time < timestamp(end_year, end_month, end_date, 23, 59))

fast_ma_period = input(title="Fast MA", type=input.integer, defval=2)
slow_ma_period = input(title="Slow MA", type=input.integer, defval=5)

fast_ma = sma(close, fast_ma_period)
slow_ma = sma(close, slow_ma_period)

plot(fast_ma, color=color.green, linewidth=1)
plot(slow_ma, color=color.yellow, linewidth=3)

buy_condition = crossover(fast_ma, slow_ma)
sell_condition = crossunder(fast_ma, slow_ma)

if between_dates
    strategy.entry("ADA door", strategy.long, when=buy_condition)

strategy.close("ADA door",  when=sell_condition)
Step 5. Click “Add to Chart“. Make sure the “Object tree” is the current panel on the right vertical shortcut options.
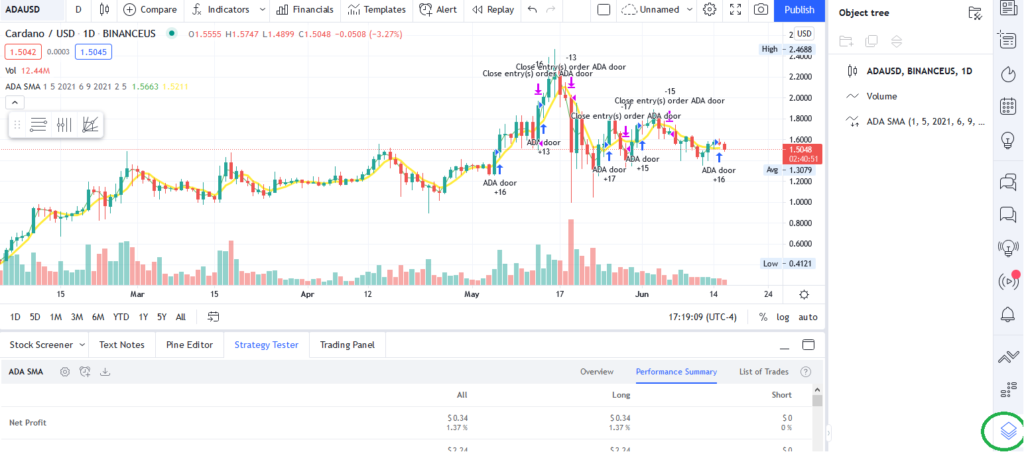
Step 6. Select “Strategy Tester” for backtest results.
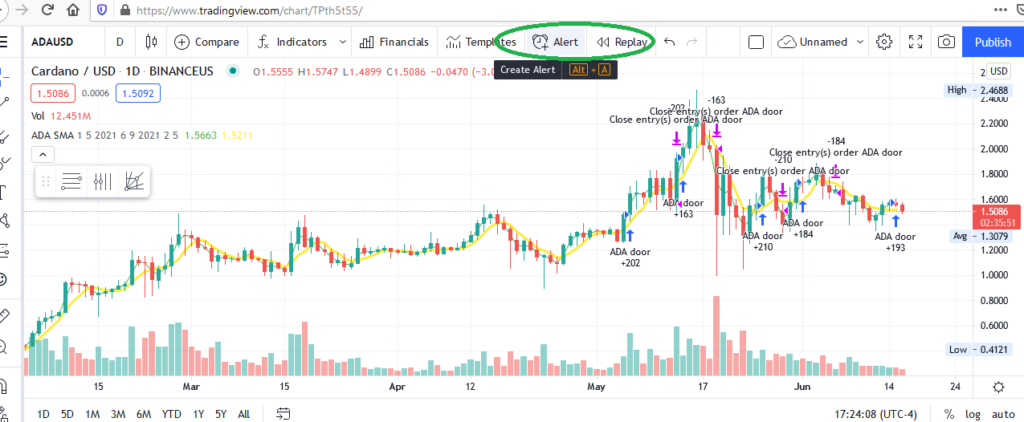
Step 7. To create an alert, select the alarm clock icon.
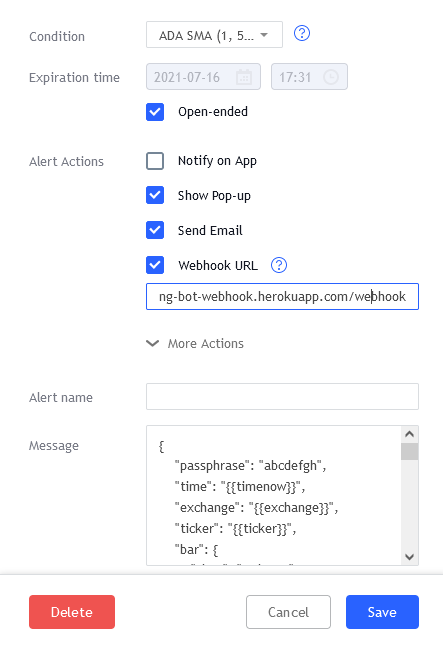
Step 8. In the Condition dropdown, select “ADA SMA“. This is the name of our indicator created in Step 3 the Pine Editor.
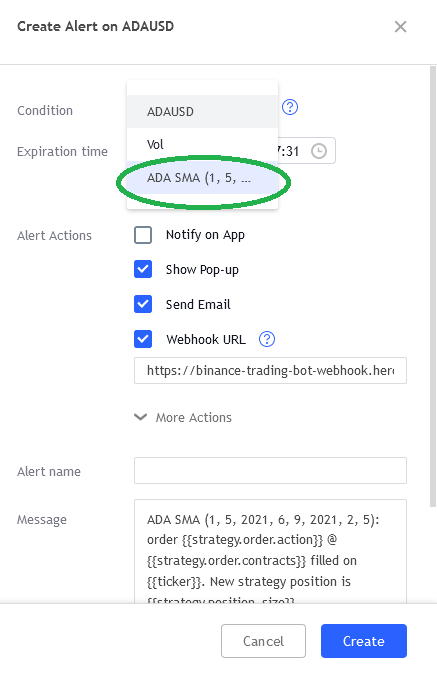
Step 9. Copy the contents of sample TradingView payload below. Paste to the Message textarea in the Alert being created (refer to above Step 8)
{
    "passphrase": "abcdefgh",
    "time": "{{timenow}}",
    "exchange": "{{exchange}}",
    "ticker": "{{ticker}}",
    "bar": {
        "time": "{{time}}",
        "open": {{open}},
        "high": {{high}},
        "low": {{low}},
        "close": {{close}},
        "volume": {{volume}}
    },
    "strategy": {
        "position_size": {{strategy.position_size}},
        "order_action": "{{strategy.order.action}}",
        "order_contracts": {{strategy.order.contracts}},
        "order_price": {{strategy.order.price}},
        "order_id": "{{strategy.order.id}}",
        "market_position": "{{strategy.market_position}}",
        "market_position_size": {{strategy.market_position_size}},
        "prev_market_position": "{{strategy.prev_market_position}}",
        "prev_market_position_size": {{strategy.prev_market_position_size}}
    }
}
Step 10. Save the alert. You will start receiving emails when the criteria are met.
PART 2 SETUP BINANCE API KEY
This tutorial uses Binance exchange. Other exchanges that supports API and official Python Library (e.g. Coinbase Pro, Kucoin, etc) can also be used for trading bots.
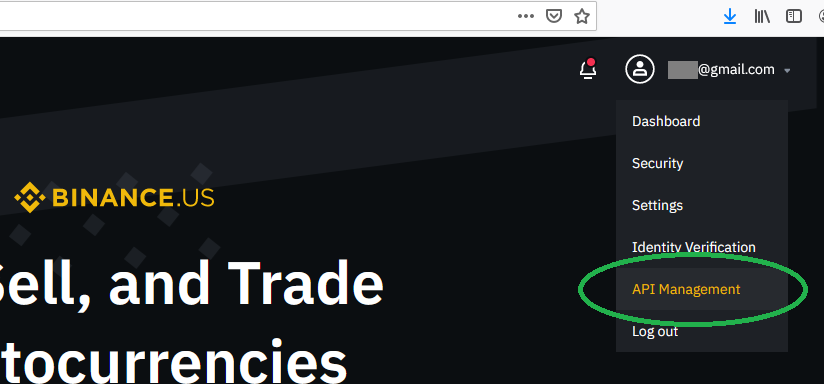
Step 1. Login to your Binance US account.
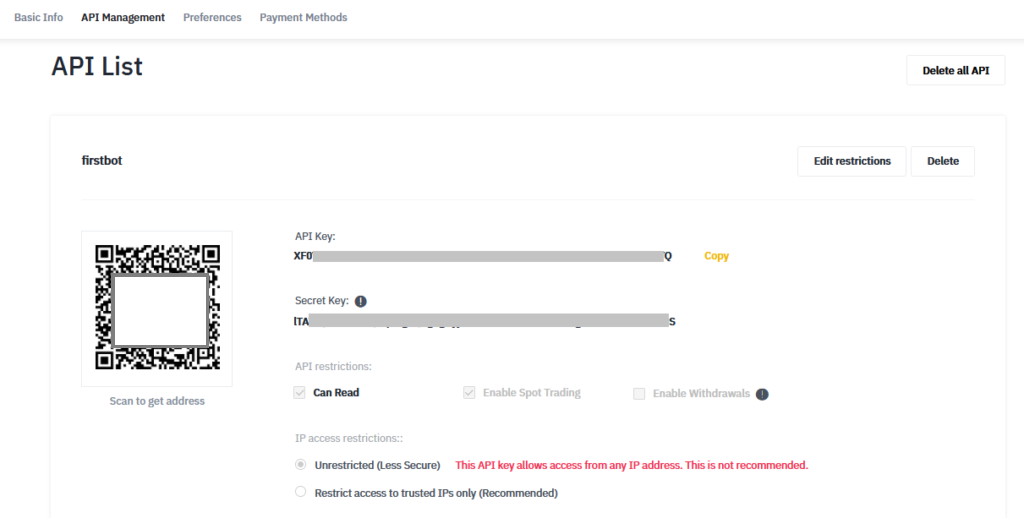
Step 2. Click “API Management” under the email address drop-down.
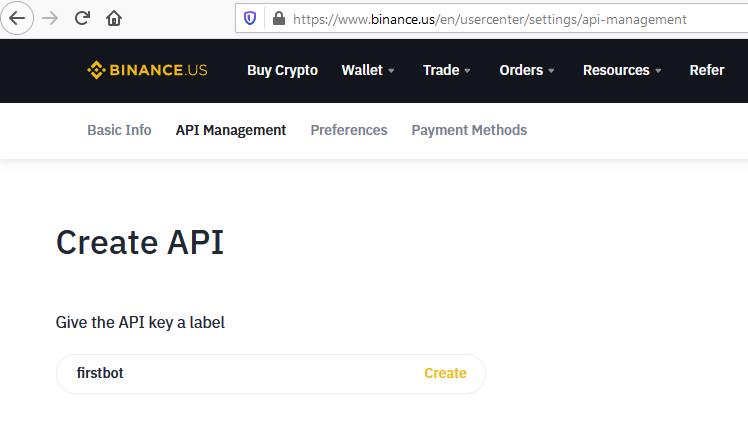
Step 3. Enter the API key label. Click “Create” when done.
Step 4. An email is sent to confirm that you created the API key.
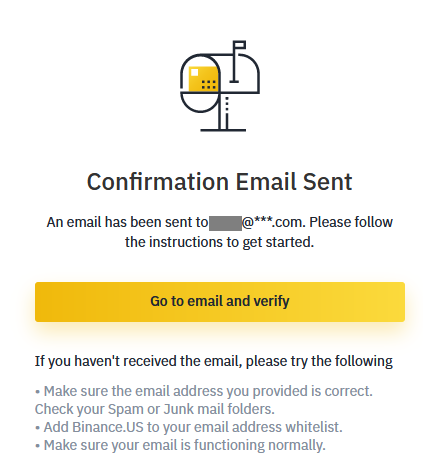
Step 5. Open your email. Click “Confirm API Key Creation” button.

Step 6. The newly-created API key will be displayed. Make sure to save the Secret Key somewhere safe. It will disappear after refreshing the page. The API Key and Secret Key will later be used in PART 3 Step 5.
PART 3. SETUP ENVIRONMENT VARIABLES
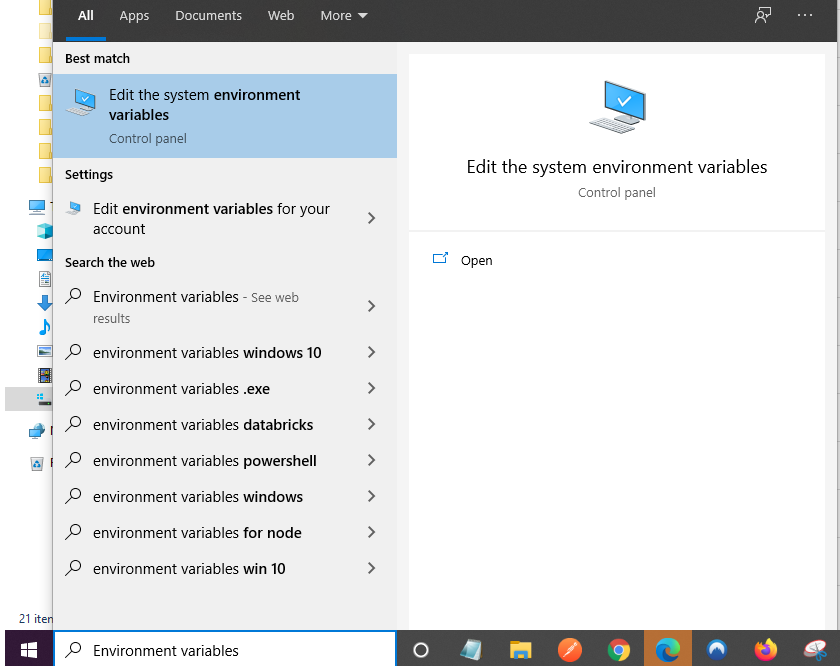
Step 1. Type “Environment variables” in the Windows search bar. Choose the Best match.
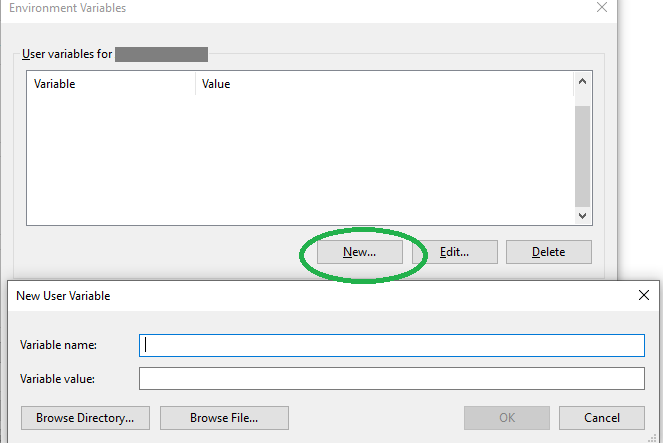
Step 2. Click “Environment Variables…” button

Step 3. Click “New…” In the Variable Name and Variable Value fields, enter these combinations
| Variable name | Variable value | Notes |
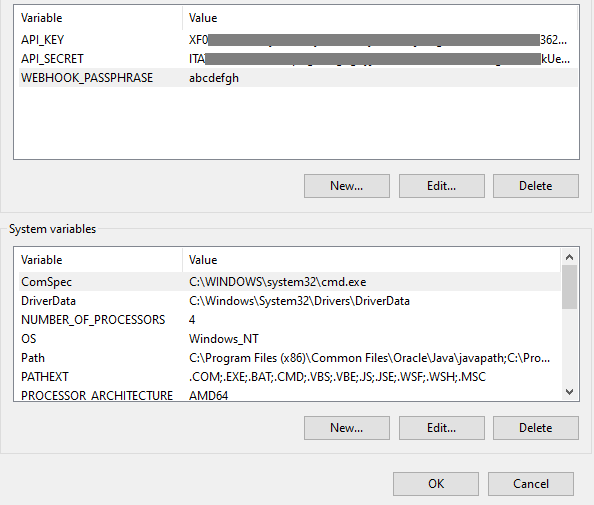
| API_KEY | Copy the API Key from Part 2 Step 6 | |
| API_SECRET | Copy the Secret Key from Part 2 Step 6 | |
| WEBHOOK_PASSPHRASE | abcdefgh | Refer to the passphrase used in Part 1 Step 9 |
Step 5. The list of environment variables for the current user should look like this. Click the OK button to save.
PART 4 SETUP PYTHON PROJECT WORKSPACE
Step 1. Install Pycharm Community Edition in https://www.jetbrains.com/pycharm/download/
This tutorial uses the latest stable release pycharm-community-2021.1.2.exe
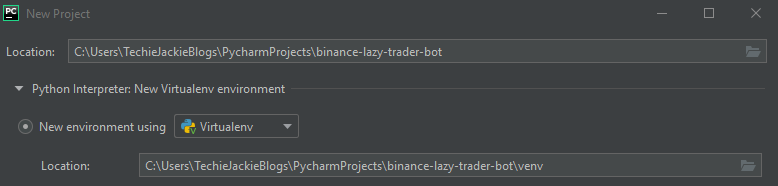
Step 2. Open Pycharm. Create New Project with a Virtual environment. The latest Pycharm installer will always have new virtual environment installed.
Step 3. Create new file with filename requirements.txt
flask
gunicorn
python-binance
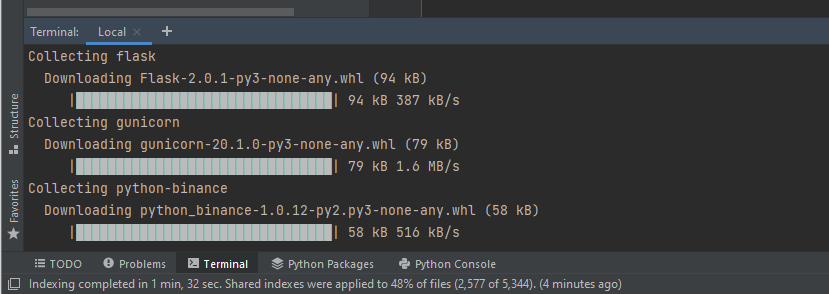
Step 4. Select “Terminal” on the bottom panel. This will launch a command line. Execute the command
pip3 install -r requirements.txt
Step 5. Create new file with filename app.py
Go to https://flask.palletsprojects.com/en/1.1.x/quickstart/
Copy the contents of Minimal Application
from flask import Flask
app = Flask(__name__)

@app.route('/')
def hello_world():
    return 'Hello, World!'
Step 6. Create a file with filename Procfile. Associate it to a text file. Copy the below contents
Step 7. In the Terminal window, execute
flask run
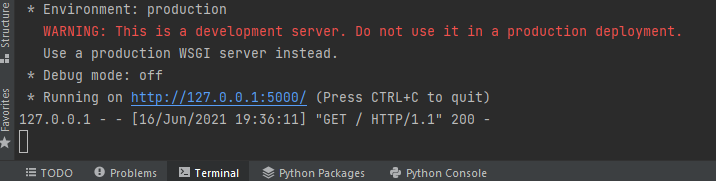
The Terminal logs will display above message and no errors.
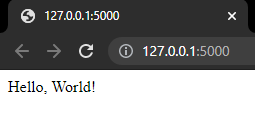
Step 8. Open http://127.0.0.1:5000/ in a web browser. This will confirm that the local flask application is up.
Step 9. Now we are ready to write the code that consumes a JSON payload. Open app.py and copy the below code. Note that the actual execution of orders is commented out. Remember to uncomment the code when you want to execute the buy and sell orders.
import json, os

from binance.client import Client
from binance.enums import *
from flask import Flask, request

app = Flask(__name__)
client = Client(os.environ.get('API_KEY'), os.environ.get('API_SECRET'), tld='us')

def order(side, quantity, symbol, order_price, passphrase, order_type=ORDER_TYPE_LIMIT, timeInForce=TIME_IN_FORCE_GTC):
    try:
        print(f"{passphrase} {symbol} Sending order {order_type} - {side} {quantity} {symbol} at {order_price}.")
        #order = client.create_order(symbol=symbol, side=side, type=order_type, quantity=quantity, timeInForce=timeInForce, price=order_price)
        print(f" {passphrase} {symbol} Not Executed order {order_type} - {side} {quantity} {symbol} at {order_price}.")
    except Exception as e:
        print("An exception occured - {}".format(e))
        return False

    return order


@app.route('/')
def welcome():
    return "<h1>This is my first trading bot</h1>"


@app.route('/webhook', methods=['POST'])
def webhook():

    data = json.loads(request.data)

    if data['passphrase'] != os.environ.get('WEBHOOK_PASSPHRASE'):
        return {
            "code": "error",
            "message": "Nice try, invalid passphrase"
        }
    side = data['strategy']['order_action'].upper()
    quantity = data['strategy']['order_contracts']
    ticker = data['ticker'].upper()
    order_price = data['strategy']['order_price']

    order_response = order(side, quantity, ticker, order_price, data['passphrase'])


    if order_response:
        return {
            "code": "success",
            "message": "Order executed."
        }
    else:
        print("Order Failed.")

        return {
            "code": "error",
            "message": "Order Failed."
        }
Step 10. In the Terminal window, execute
flask run
PART 5 TEST USING REST CLIENT
This tutorial uses Insomnia as a REST Client. Feel free if you are more comfortable in using other REST clients.
Step 1. Download Insomnia REST client https://insomnia.rest/download
Step 2. Under the Dashboard, click Insomnia
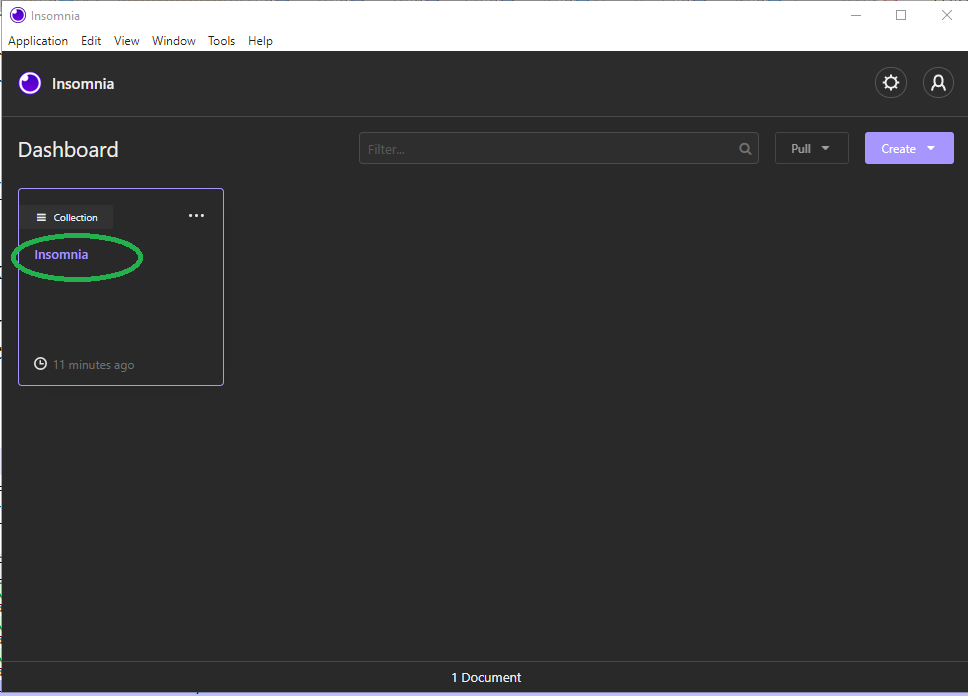
The options will be displayed as below
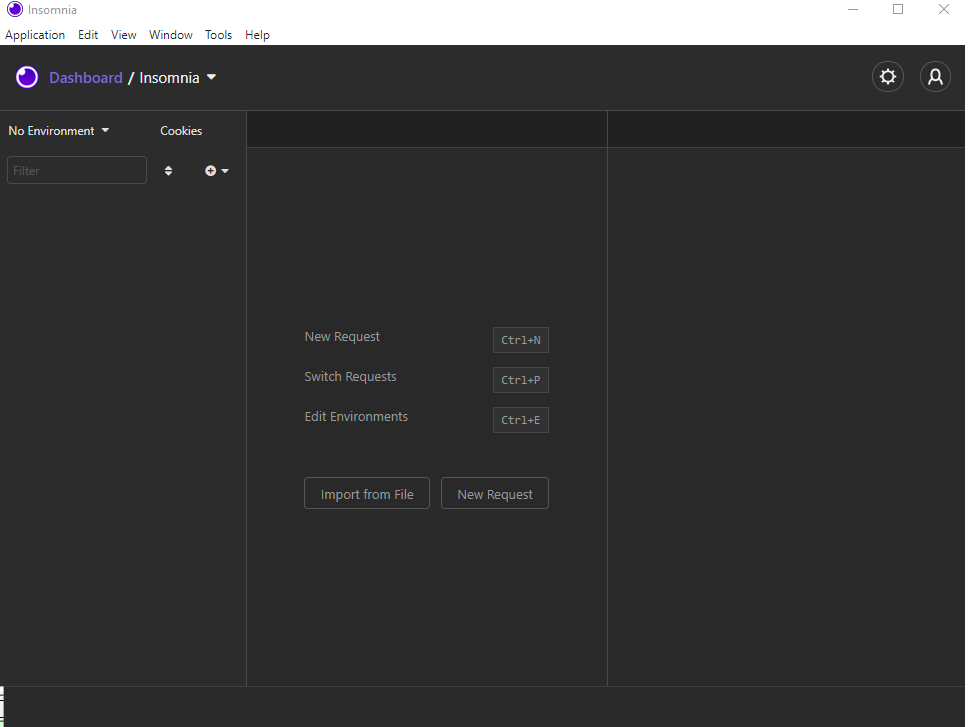
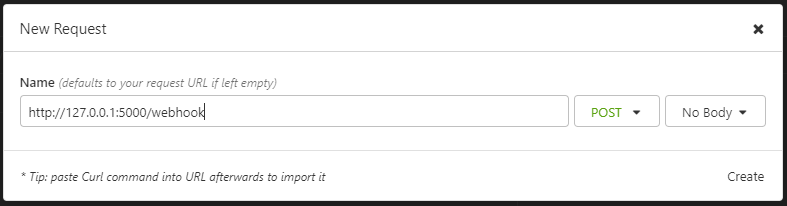
Step 3. Press Ctrl + N to create a new request. Enter “http://127.0.0.1:5000/webhook” as the Name. Change “GET” to “POST” as the Method. Click “Create“.
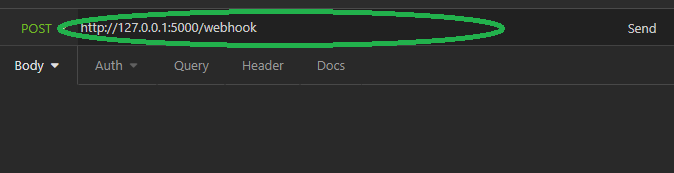
Step 4. You may have to enter again the URL http://127.0.0.1:5000/webhook after the POST dropdown
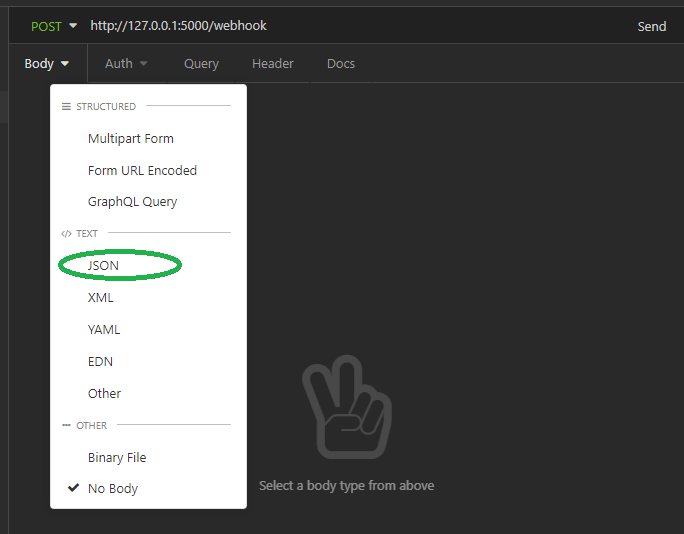
Step 5. In the middle panel of Insomnia, select the “Body” dropdown. Click “JSON”
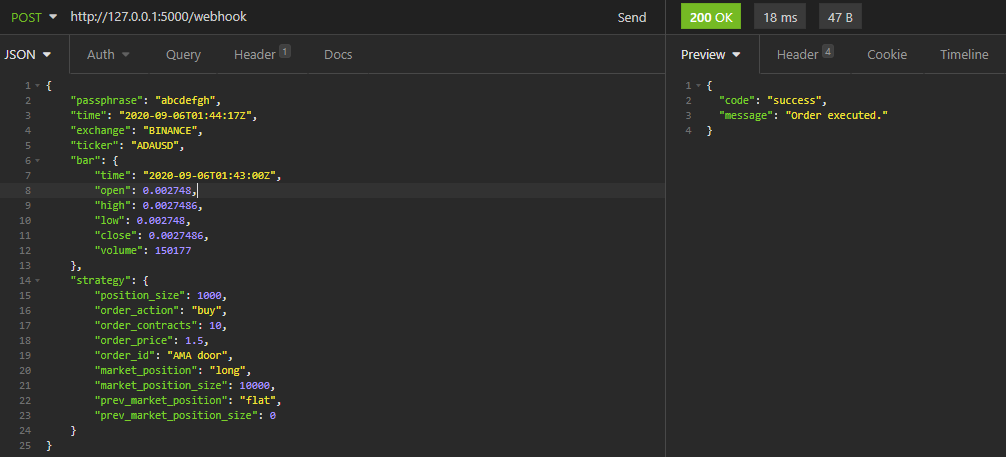
Step 6. Copy the JSON payload was sent to your email when the alert was triggered. You may use this sample filled payload:
{
    "passphrase": "abcdefgh",
    "time": "2020-09-06T01:44:17Z",
    "exchange": "BINANCE",
    "ticker": "ADAUSD",
    "bar": {
        "time": "2020-09-06T01:43:00Z",
        "open": 0.002748,
        "high": 0.0027486,
        "low": 0.002748,
        "close": 0.0027486,
        "volume": 150177
    },
    "strategy": {
        "position_size": 1000,
        "order_action": "buy",
        "order_contracts": 10,
        "order_price": 1.5,
        "order_id": "AMA door",
        "market_position": "long",
        "market_position_size": 10000,
        "prev_market_position": "flat",
        "prev_market_position_size": 0
    }
}
Step 7. Click “Send” button. The results will be displayed on the right panel.
Step 8. Familiarize yourself with the Binance API errors. Update the Python and/or Pinescript codes as needed.
| Error code and message | Explanation and solution | |
| 01 | APIError(code=-2010): Account has insufficient balance for requested action | The parameters are all correct, however there is not enough balance in the Binance account to execute the order Solution: Deposit enough USD or cryptocurrency |
| 02 | APIError(code=-1013): Filter failure: MIN_NOTIONAL | Scenario: XTZUSD Sending order LIMIT – BUY 0.02 XTZUSD at $7.3865. Solution: Solution: Increase the order_contracts to at least 1 |
| 03 | APIError(code=-1111): Precision is over the maximum defined for this asset | Scenario: XTZUSD Sending order LIMIT – BUY 10 XTZUSD at $1.73215. Solution: Set the price’s decimal places up to 4 only, e.g. $1.7321 |
| 04 | APIError(code=-1013): Filter failure: PERCENT_PRICE | Scenario: Current price of XTZUSD is $8.4972. Sending order LIMIT – BUY 10 XTZUSD at $1.5. The price cannot be lower than $1.6904 |
| 05 | APIError(code=-1013): Filter failure: LOT_SIZE | Scenario: Current price of XTZUSD is $8.4972. XTZUSD Sending order LIMIT – BUY 1000000 XTZUSD at $1.74. Solution: Set the order_contracts to lower amount, e.g. 100000. If order_contracts is 541.861, decrease the precision, e.g. 541.86 |
PART 6 SETUP GIT
Step 1. Install Git from https://git-scm.com/downloads
Step 2. Open Git CMD and run this in the command line.
git config --global user.email "hello@example.com"
PART 7 DEPLOY IN HEROKU
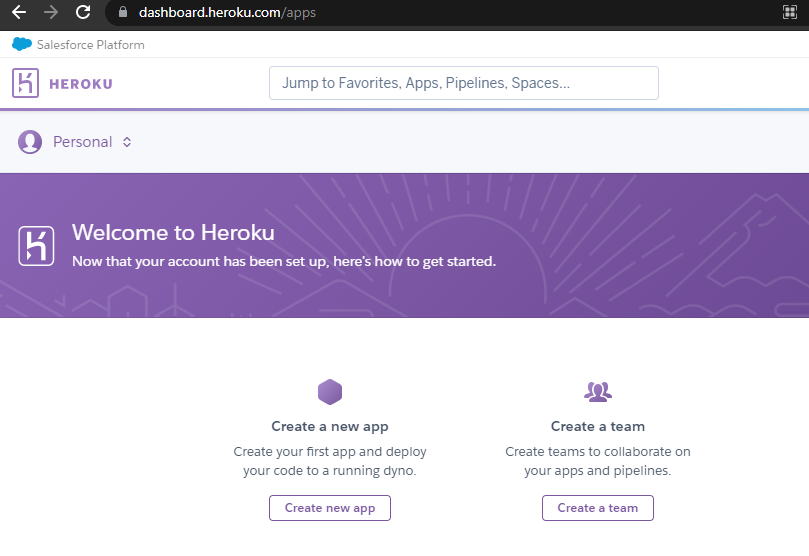
Step 1. Sign up for a Heroku account in https://signup.heroku.com/account if you do not have an account yet.
Step 2.
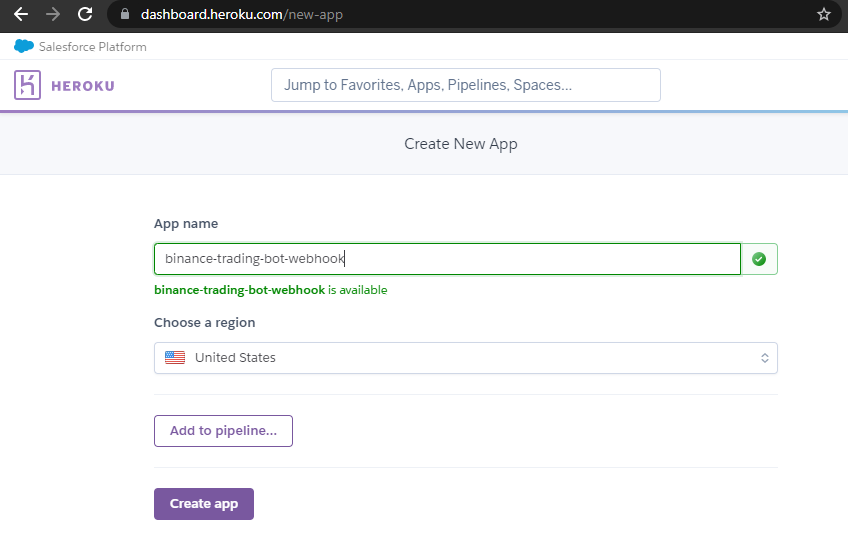
Step 3. Enter the application name
Step 4. Setup the environment variables. In Heroku, this can be found in the application’s Dashboard –> Settings tab. Scroll to Config Vars. Click on the “Reveal Config Vars” button.
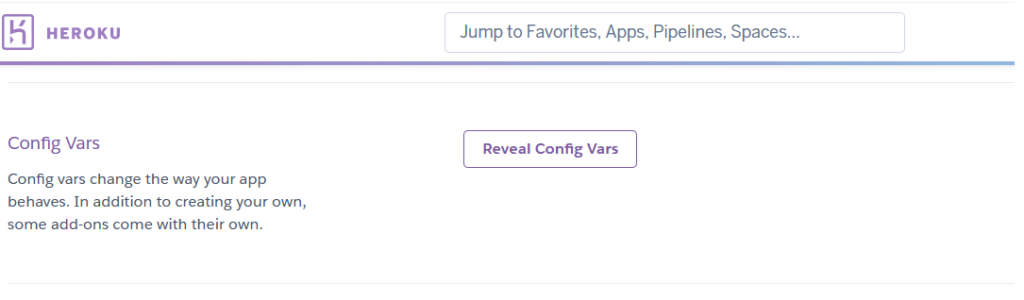
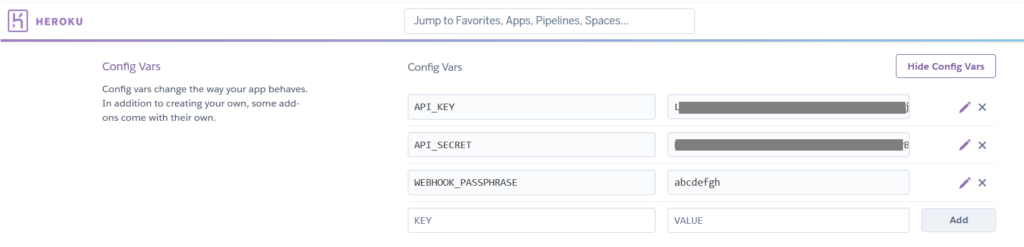
Add the following KEYs and VALUEs:
| Variable name | Variable value | Notes |
| API_KEY | Copy the API Key from PART 2 Step 6 | |
| API_SECRET | Copy the Secret Key from PART 2 Step 6 | |
| WEBHOOK_PASSPHRASE | abcdefgh | Refer to the passphrase used in PART 1 Step 9 |
Step 4. Once the application is successfully created, go to the application’s Dashboard –> Deploy tab. Refer to Deploy using Heroku Git.
Step 4a. Download and install Heroku installer that can be found in https://devcenter.heroku.com/articles/heroku-cli
Step 4b. Run this command in command prompt:
heroku login
It will ask you to press any key. Then a browser will open to Heroku login page. Enter your credentials. Below is a sample response in the command prompt.

Step 4c. To setup SSH key, run in the command prompt:
heroku keys:add

Type in y
Uploading C:\Users\TechieJackieBlogs.ssh\id_rsa.pub SSH key… done
Step 4d. Run in the command prompt:
ssh -v git@heroku.com
To verify the key has been added, open https://dashboard.heroku.com/account and scroll to the SSH Keys section.
Step 4e. In the Pycharm project Terminal, issue these commands:git init
heroku git:remote -a <<App Name in Step 3>>
For example:
heroku git:remote -a mywebhook
If the commands do not work, double-check the PATH to include C:\Program Files\heroku\bin and C:\Program Files\Git\cmd
Step 4f. When there are changes in local codes that need to be committed to the Heroku Git server, execute these commands:
git add .
git commit -am "initial commit"
git push heroku master
Step 4g. To verify that the Heroku web application is live, open in a web browser https://{app-name}.herokuapp.com . For example, https://mywebhook.herokuapp.com/
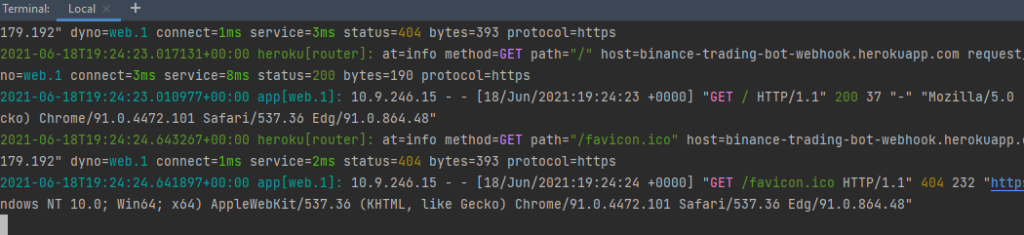
To check for errors, in a command line or Pycharm Terminal, execute
heroku logs --tail
| Possible Error | Possible Causes | How to fix |
| at=error code=H14 desc=”No web processes running” | The Procfile may have a .txt file extension | 1) Rename the local file 2) Run in command line git add . |
| at=error code=H14 desc=”No web processes running” | There is no Procfile added in git | 1) Create a file named Procfile (no extension) with content web: gunicorn app:app2) Run in command line git add . |
| at=error code=H14 desc=”No web processes running” | No web dyno was setup | 1) Run in command line heroku ps:scale web=1 |
| at=error code=H10 desc=”App crashed” method=GET path=”/” | When running heroku logs --tail , the below messages are in the logs:Starting process with command gunicorn app:appbash: gunicorn: command not found Process exited with status 127 | 1) Check requirements.txt if gunicorn is in the file. If not, add it to the file. 2) Run in command line git add . |
The list of errors and explanations are found in https://devcenter.heroku.com/articles/error-codes
PART 8 GO LIVE
Step 1. Once you finalized a profitable strategy and replaced the Pinescript in Part 1 Step 4, it’s time to uncomment the Python code in app.py to execute buying or selling in Binance (Part 4 Step 9)
order = client.create_order(symbol=symbol, side=side, type=order_type, quantity=quantity, timeInForce=timeInForce, price=order_price)
Step 2. Commit the changes to Heroku Git (Follow Part 7 Step 4f)
Step 3. In Pycharm Terminal, execute heroku logs –tail
Step 4. Open the TradingView alert. Set the Webhook URL to the https://{app-name}.herokuapp.com/webhook (Part 1 Step 8)
Step 5. Monitor TradingView alert and your Binance app when the orders are executed. Happy lazy trading!
Areas of Improvement:
- Write a server-side validation to check there is enough balance to fill the order. Adjust the order_contracts based on the allowed balance to be used for the transaction.
- Round off the contract price and quantity in server-side (Python) or in Pinescript side to prevent errors mentioned in PART 5 Step 8 Familiarize yourself with the Binance API errors.
The source codes for this project can be downloaded here.