This tutorial is a continuation of Part 1 of the How to Build a “Value Stocks” Screener Web Application (Using Java + Spring Boot) Series. This blog post will cover PART 2 – How to Create the Value Stocks Screener User Interface (UI).
On the previous post, we finished creating a REST API that returns a JSON object with a list of stocks that are considered “value stocks” based on parameters passed on to the API. Value stocks are companies with share prices that are lower than what their fundamentals suggest they should be.
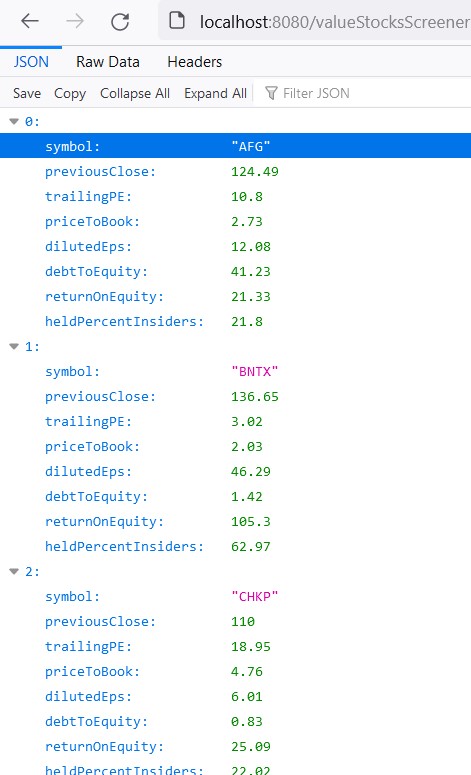
In this tutorial, we are going to create a User Interface that will call the REST API to make the value stocks list more readable in the web browser. We will be using React JS, a free JavaScript library for building user interfaces based on UI components. Here is a sample JSON object with the list of value stocks:
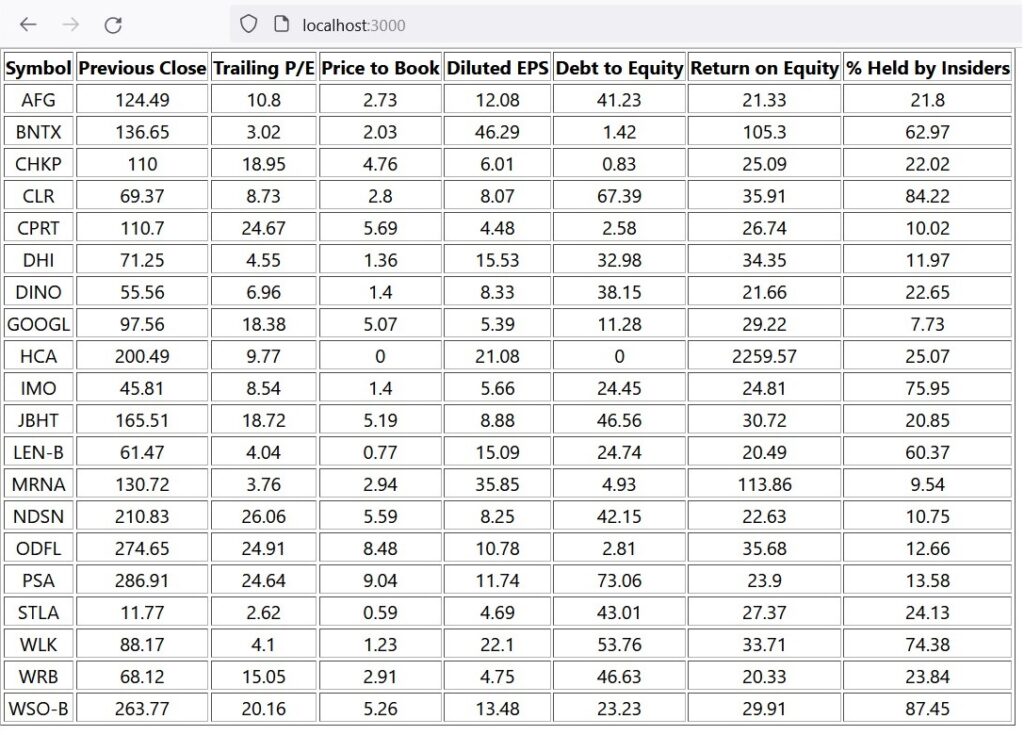
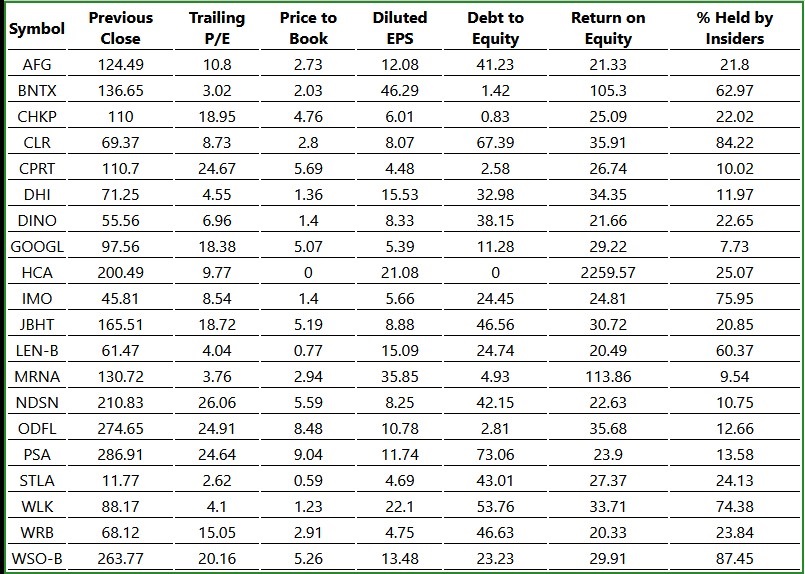
We are going to display the list in a table like this:
Let’s begin.
Step 1. Download and install the NodeJS installer from https://nodejs.org/en/download/
Step 2. Open the Command Line and change the current directory to the “src\main” directory of your project workspace created from Part 1 of this tutorial series. For example:
C:>cd workspaces\ValueInvesting\ValueStocksScreener\src\main
Step 3. Follow the instructions on Creating a React App from the official Github page of React https://github.com/facebook/create-react-app#creating-an-app. Use “frontend” as the directory name of your react app.
npx create-react-app frontend
The initial project structure will be created as below:
frontend
├── README.md
├── node_modules
├── package.json
├── .gitignore
├── public
│   ├── favicon.ico
│   ├── index.html
│   └── manifest.json
└── src
    ├── App.css
    ├── App.js
    ├── App.test.js
    ├── index.css
    ├── index.js
    ├── logo.svg
    └── serviceWorker.js
    └── setupTests.js
Step 4. Change the directory to frontend. Then start the development server by running npm start.
cd frontend
npm start
Below will be the output on the Command Line.
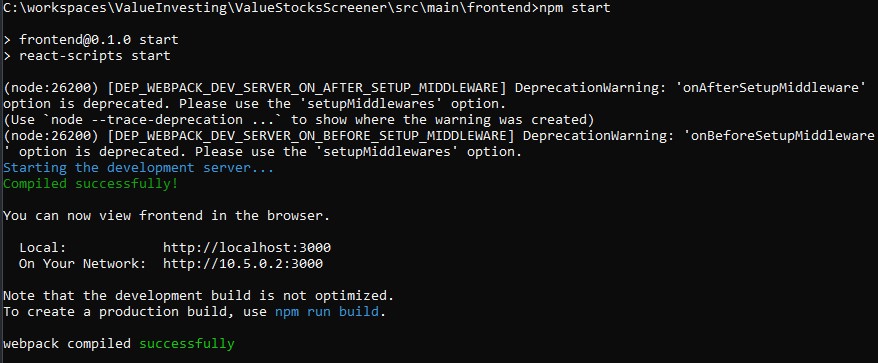
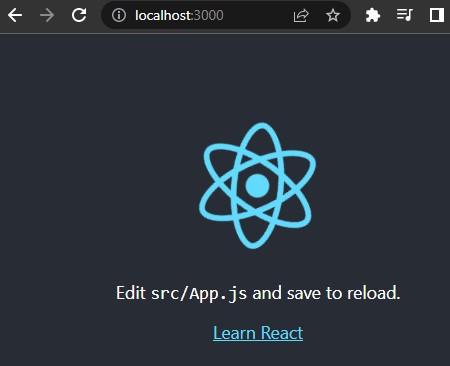
Also, npm start opens http://localhost:3000/ on a new web browser.
Step 5. Terminate the development server by pressing Ctrl + C on the Command Line. Install Axios library for React. Axios will be used for sending asynchronous HTTP requests to the REST API endpoint.
npm install axios
Step 6. Update the App.js file under “frontend\src”.
import React from "react";
import './App.css';
import axios from "axios";

const baseURL = "http://localhost:8080/valueStocksScreener";
const Stocks = () => {
    const[Stocks, setStocks] = React.useState([]);
    const fetchStocks = () => {
        axios.get(baseURL).then(res => {
            console.log(res)
            setStocks(res.data)
        });
    };
    React.useEffect(() => {
        fetchStocks ();
    }, []);
    return Stocks.map((stock, index) => {
        return (
        	<tbody>
				<tr key={index}>
					<td>{stock.symbol}</td>
					<td>{stock.previousClose}</td>
					<td>{stock.trailingPE}</td>
					<td>{stock.priceToBook}</td>
					<td>{stock.dilutedEps}</td>
					<td>{stock.debtToEquity}</td>
					<td>{stock.returnOnEquity}</td>
					<td>{stock.heldPercentInsiders}</td>
				</tr>
			</tbody>
        )
    });
}

function App() {
  return (
    <div className="App">
      <table border="1">
      	<tbody>
        	<tr>
          		<th>Symbol</th>
          		<th>Previous Close</th>
          		<th>Trailing P/E</th>
          		<th>Price to Book</th>
          		<th>Diluted EPS</th>
          		<th>Debt to Equity</th>
          		<th>Return on Equity</th>
          		<th>% Held by Insiders</th>
        	</tr>
        </tbody>
       	<Stocks />
      </table>
    </div>
  );
}

export default App;
Optionally, you may also update App.css to add style to the HTML table.
.App {
  width: 100%;
  height: 100vh;
  display: flex;
}

table {
  border: 2px solid forestgreen;
  width: 800px;
  height: 200px;
}

th {
  border-bottom: 1px solid black;
}

td {
  text-align: center;
  border-bottom: 1px solid black;
}
Step 7. Re-launch the server by running npm start on the Command Line again. Your web browser will open http://localhost:3000. A request will be sent to the REST API endpoint that was created on Part 1 of this tutorial series. Make sure your Spring Boot application is up and running.
Finally, watch out for any errors in the Console of the browser’s Developer tools. Please contact me if there are problems or errors that you encountered while following this tutorial.
Congratulations! You now have a running “Value Stocks” Screener on your local machine.
On my next tutorial, we will dig in on how to deploy the web application on Amazon Web Services (AWS) cloud. Cheers!
References:
Spring Boot Tutorial | Spring Boot Full Stack with React.js | Full Course | 2021